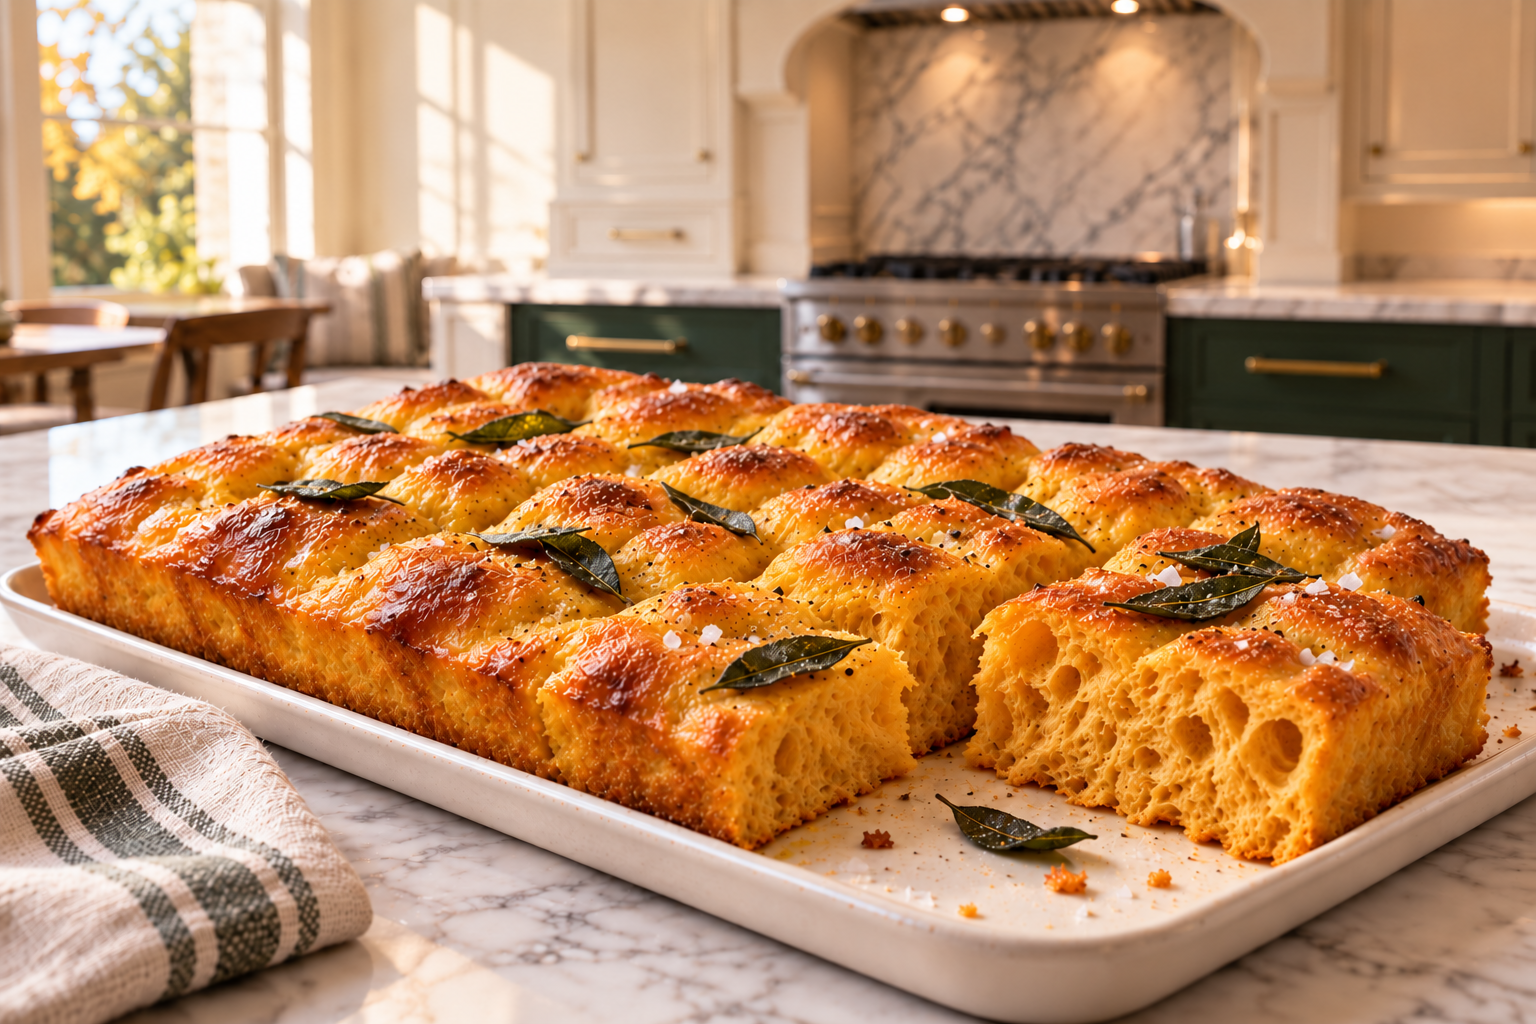
Pumpkin brings a soft golden color and a tender crumb to this savory focaccia. Olive oil gives the edges their crisp finish, while brown butter and fresh sage add a warm, nutty aroma just before serving.
The dough comes together with a spoon, followed by three gentle sets of folds. There is no traditional kneading, but there is time to let the dough become airy and relaxed—a good afternoon project when soup is already planned for dinner.
Cut it into generous squares and bring it to the table warm, with a little flaky salt caught in the dimples.
The Recipe
Yield: One focaccia, approximately 12 pieces
Pan: 9 × 13-inch metal baking pan, at least 2 inches deep
Active preparation: Approximately 25 minutes
Resting and rising: Approximately 2½–3¼ hours
Baking: Approximately 25–35 minutes
Cooling: At least 25 minutes
Total time: Approximately 3¾–4½ hours, depending on room temperature
Ingredients
For the focaccia
- 500 g bread flour
- 300 g lukewarm water
- 150 g plain pumpkin purée
- 7 g instant yeast
- 15 g honey
- 10 g fine sea salt
- 5 tablespoons olive oil, divided
- Flaky salt, to taste
For the brown butter and sage
- 4 tablespoons unsalted butter (56 g)
- 10–12 fresh sage leaves, washed and thoroughly dried
How to Make Pumpkin Focaccia
1. Mix the dough
In a large bowl, stir together the water, pumpkin purée, honey, and instant yeast.
Add the bread flour and fine sea salt. Mix firmly with a wooden spoon or sturdy spatula until no dry flour remains. The dough should be soft, sticky, and shaggy.
Drizzle 1 tablespoon of the olive oil over the dough. Cover the bowl and let it rest for 20 minutes.
2. Give the dough three sets of folds
Lightly oil your hand. Lift one edge of the dough, stretch it gently upward, and fold it across the center. Turn the bowl and repeat on the remaining three sides. These four folds make one complete set.
Cover and rest for 20 minutes. Repeat the full set of folds, then cover and rest for another 20 minutes.
Complete a third and final set of folds.
The dough should gradually feel more elastic and hold its shape a little better, although it will remain soft and sticky. Stretch only as far as it allows without tearing.
3. Let the dough rise
After the final set of folds, cover the bowl and leave it in a comfortably warm place for approximately 45–60 minutes.
Look for a noticeable increase in volume, a puffier surface, and bubbles around the edges. In a cool kitchen, this may take longer.
4. Transfer to the pan
Pour 2 tablespoons of olive oil into the metal baking pan, coating the bottom and sides.
Gently ease the dough into the pan. Turn it once to coat it in oil, then use lightly oiled fingers to encourage it outward.
If it springs back, leave it alone for 15–20 minutes before gently stretching it again. Avoid forcing it into the corners or pressing out the bubbles.
Cover and let rise for approximately 45–75 minutes in total, until the dough nearly fills the pan and looks airy, relaxed, and slightly jiggly when the pan is moved.
5. Preheat and dimple
During the final rise, preheat a conventional oven to 425°F (220°C).
Drizzle the remaining 2 tablespoons of olive oil over the dough. With oiled fingertips, press deep dimples across the surface, reaching down toward the bottom of the pan without dragging or tearing the dough.
Sprinkle lightly with flaky salt.
6. Bake until deeply golden
Bake on the middle rack for approximately 25–35 minutes, beginning to check at 25 minutes.
The focaccia is ready when the top is deeply golden, the edges are crisp and beginning to pull away from the pan, and the underside is golden and firm when carefully lifted with a spatula.
Baking time varies with the oven and pan. If the top is browning quickly while the base still looks pale, loosely cover the top with foil and continue baking until the bread is cooked through.
7. Brown the butter and crisp the sage
While the focaccia bakes, melt the butter in a small, light-colored saucepan over medium-low heat.
Swirl the pan frequently. The butter will foam as it cooks. When the milk solids begin turning pale golden, add the thoroughly dried sage leaves.
Continue cooking briefly, watching closely, until the leaves are crisp, the milk solids are golden brown, and the butter smells nutty. Remove from the heat and immediately pour into a heatproof bowl to stop the cooking.
The milk solids should be brown, without turning black or developing a bitter smell.
8. Finish and cool
Brush the hot focaccia with a light coating of the brown butter, including some of the browned milk solids. Scatter the crisp sage leaves over the surface.
Add the butter gradually; you do not need to use every drop if it begins pooling.
Let the focaccia rest in its pan for 10 minutes, then carefully transfer it to a wire rack. Wait at least another 15 minutes before slicing so the crumb has time to settle.
Notes for a Better Focaccia
Choose a thick pumpkin purée
Use plain, unsweetened pumpkin purée. If homemade purée has visible excess water, drain it before weighing. A watery purée can make this already-soft dough difficult to handle.
Weigh the flour
A kitchen scale keeps the dough consistent. Adding extra flour simply because the dough feels sticky can make the finished bread heavier.
Let the dough guide the timing
Room temperature affects fermentation. Before baking, the dough should look puffy and bubbly and gently wobble in the pan. A tight, flat dough needs more time.
Use a metal pan
Metal helps the base brown and develop a crisp crust. Pan color also matters: a dark pan may brown the underside faster, so check it earlier.
Give the crumb time to settle
Pumpkin adds moisture, and cutting the focaccia straight from the oven can make the center seem gummy. Cooling it on a rack also keeps steam from softening the base.
Serving Ideas
Serve warm beside roasted squash soup, a bowl of beef and bean soup, or a simple green salad. The savory pumpkin, sage, and brown butter also pair well with roast chicken and autumn vegetables.
For sandwiches, let the focaccia cool completely before splitting the pieces horizontally.
Make Ahead and Storage
This focaccia is best on the day it is baked, while the edges are crisp.
Once completely cool, store it in an airtight container at room temperature for up to 2 days. For longer storage, wrap individual portions and freeze for up to 2 months.
Reheat in a 350°F (175°C) oven until warmed through and crisp at the edges, approximately 8–12 minutes for room-temperature pieces. Frozen portions will need longer.
A Note from the Cottage
“Bring the focaccia to the table on a simple platter, with the sage leaves still resting in its golden dimples. A pot of soup, a few bowls, and warm bread are often enough to make an ordinary evening feel thoughtfully prepared.“